Once dubbed the “multi-send” feature, mail merge in Gmail lets you insert Google Contacts or a mailing list from Google Sheets. Then, personalize your email message with merge tags, include unique unsubscribe links, and enjoy a simple bulk email process using your favorite email application.
About Mail Merge in Gmail
Let’s take a look at the Google account requirements, sending limits, and other details surrounding mail merge in Gmail.
Mail merge is available to Google Workspace subscribers including Workspace Individual, Business Standard and Plus, Enterprise Starter, Standard, and Plus, and Education Standard and Plus. Supported Google Workspace accounts have a daily limit of 2,000 outgoing emails. With mail merge, you’re allowed to email up to 1,500 recipients which leaves you 500 for other emails. You can only add one recipient to the CC or BCC field using mail merge. Just keep in mind that this sends an email to that address for each recipient in the To field. For example, if you send a mail merge to 100 recipients, the address in the CC field receives 100 copies of that email. You can include attachments using mail merge; however, this counts toward your storage space. For instance, if you send a 1MB attachment to 100 recipients, you’ll use 100MB of space. Each message contains a unique auto-generated Unsubscribe link at the bottom in case that particular recipient no longer wants to receive your emails. If a recipient has previously unsubscribed from your messages and you include them in a mail merge, you’ll see a notification after you send the email with the number of recipients who won’t receive the message. You cannot use mail merge for replies or forwards or when you schedule emails or use confidential mode.
How to Add Recipients to Mail Merge in Gmail
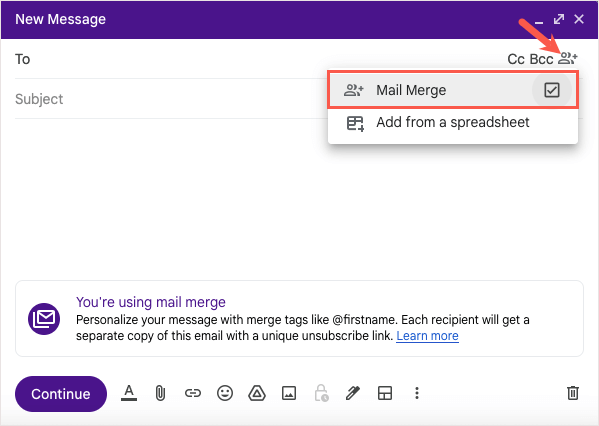
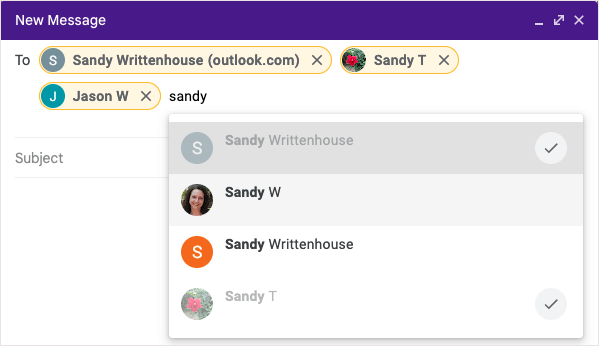
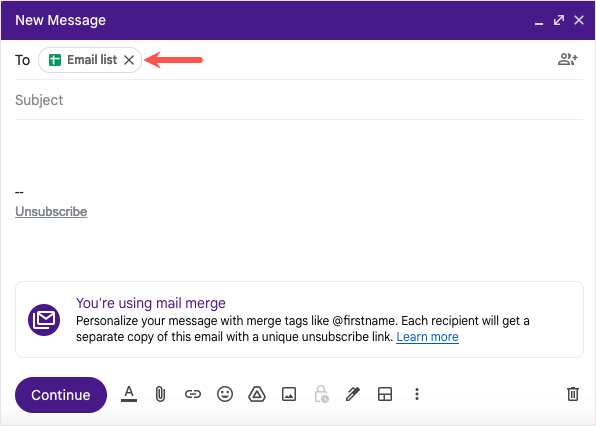
While you can select the recipients for your email after you compose your message, it’s best to select them beforehand when using mail merge. This then prompts you with the available merge tags to personalize the message.
Add Recipients From Google Contacts
To get started using your Google Contacts as recipients, follow these steps.
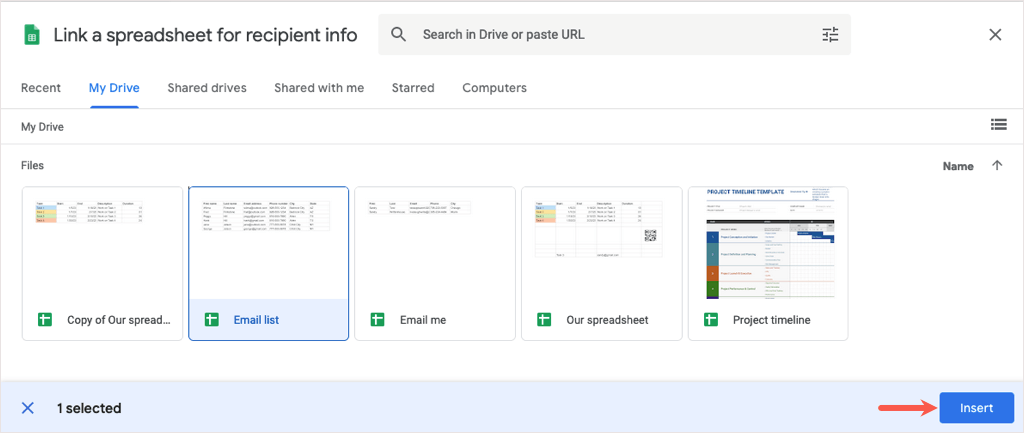
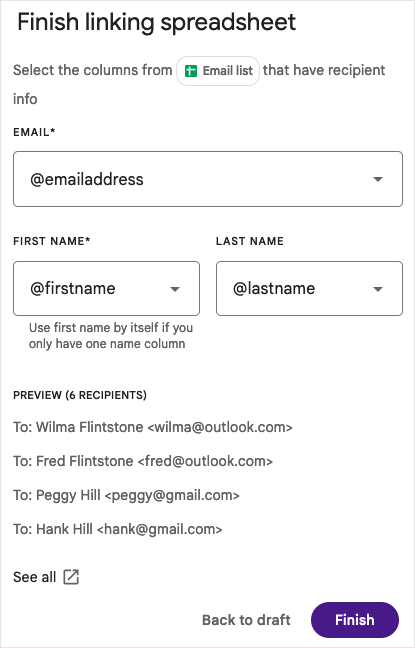
Add Recipients From Google Sheets
To insert recipients from Google Sheets, begin by making sure your sheet is set up correctly.
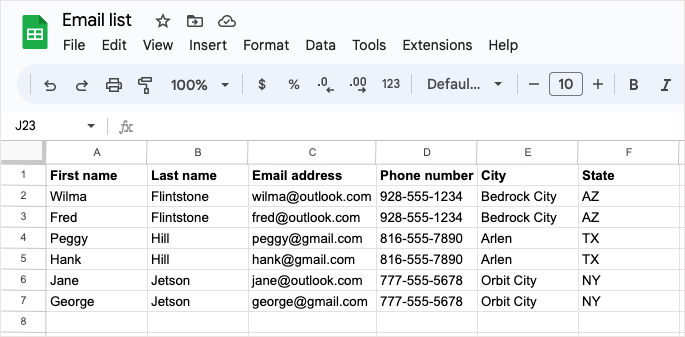
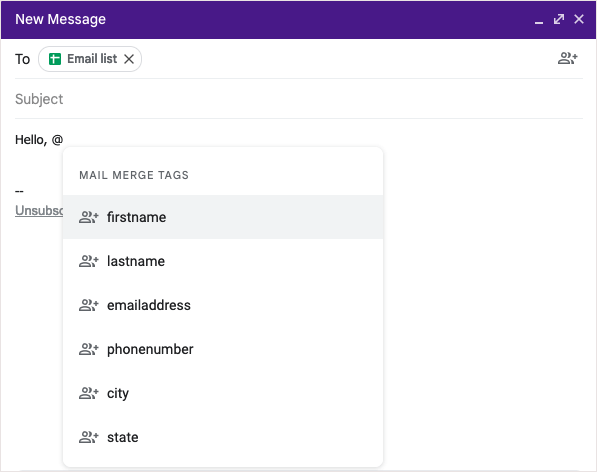
All recipient information must be on the first tab of the spreadsheet. Each recipient and their details must be in a separate row. Use text-only column headers to designate the merge tags. If a header contains a special character, the merge tag is identified by the column letter instead, for example, @A for column A.
If your sheet is ready to go, choose Compose on the top left in Gmail to create the message.
How to Use Merge Tags in Your Email
Once you have your recipients added to the mail merge, you’ll have the merge tags available to use.
As of this writing:
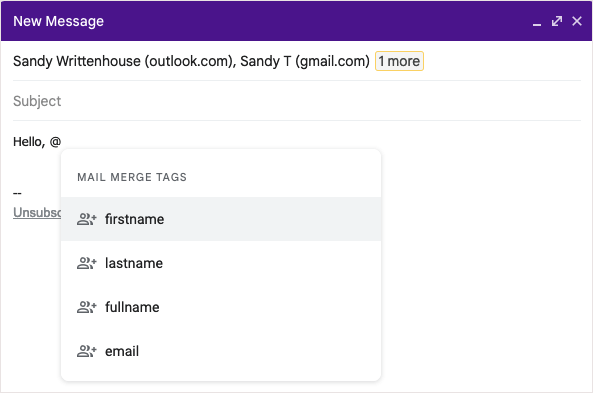
If you add recipients from Google Contacts, you can use tags for first, last, or full name as well as email address.
If you add recipients from Google Sheets, you can use tags for the column headers in your spreadsheet.
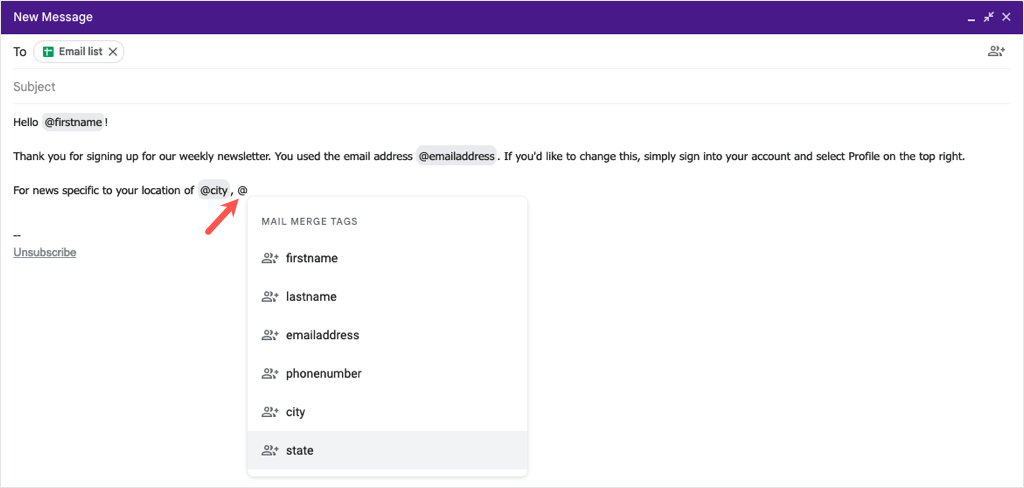
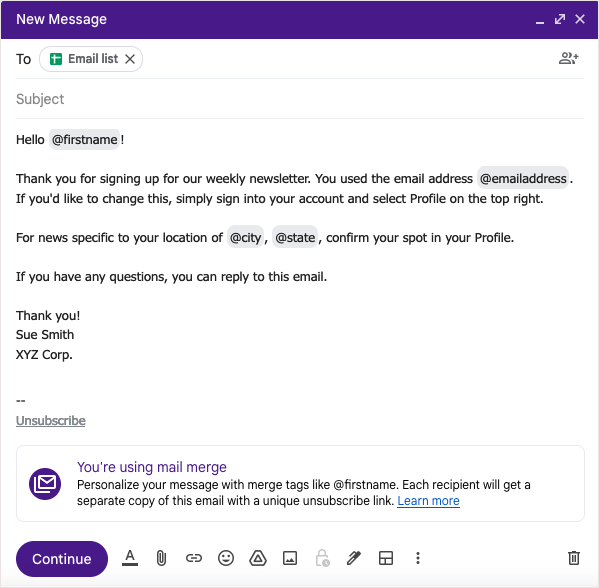
Add a Merge Tag
To add a tag to your email, type the @ (At) symbol with the tag name or select the tag from the drop-down list that appears. You can add the tags to most anyplace in your message except for the email subject line and within hyperlinked text.
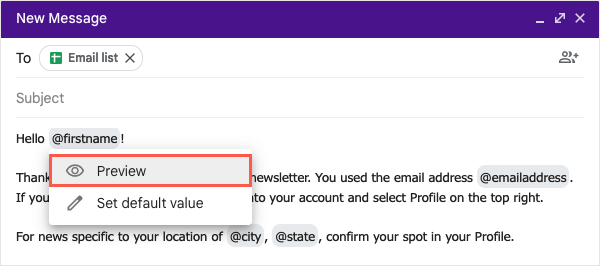
Preview a Merge Tag
If you’re curious how the details display after inserting a merge tag, you can easily see a preview.
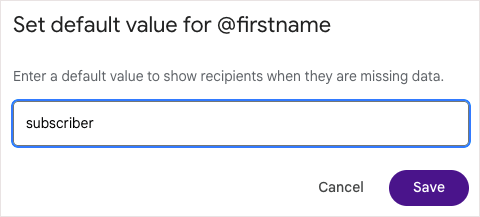
Include a Default Value for a Merge Tag
You can also set default values to the merge tags. This is helpful if a recipient is missing the detail you’re trying to add. For example, if you insert the First Name merge tag and a recipient doesn’t have a first name listed, you can use a default word or phrase instead. To add a default value, hover over the merge tag in your email and choose Set default value. Add the word or phrase in the box that appears and select Save. For any recipient missing the information, the merge tag in the email will be replaced with the default value.
Preview and Send Your Email
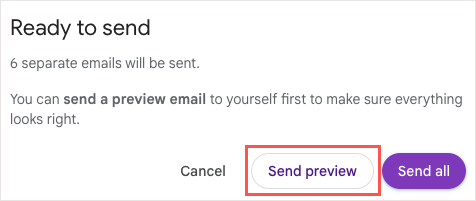
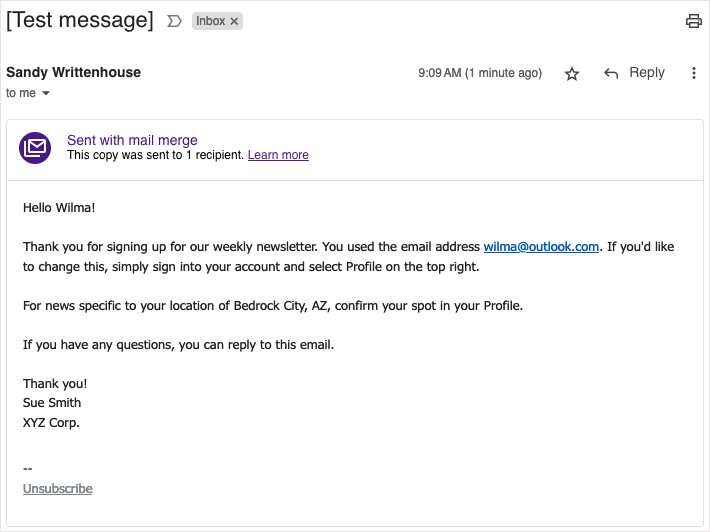
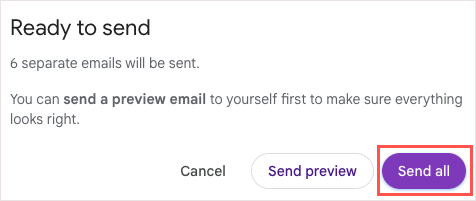
When you finish creating your mail merge in Gmail, you’ll be able to preview the email before you send it. This allows you to see the email as your recipients will so that if you need to make any changes, you can do so before hitting the Send button. You’ll receive an email labeled “Test message” to your inbox within a few minutes. The merge tags will be populated with the first recipient on your list or the default value if applicable. Once you review the preview, you can return to the Compose window to make any adjustments you like. When you’re ready to send the email, follow these same steps and choose Send all in the Ready to Send window. You can find the mail merge emails you send in your Sent folder like any other email sent.
Make Emails Easy With Gmail Mail Merge
When you need to send a newsletter, announcement, or other email to a mass, remember the mail merge functionality in Gmail. With the ability to insert contacts from Google Sheets, use merge fields for personalized emails, and preview the message before you send it, all without a third-party mail merge add-on, the process couldn’t be easier.