You need to know the amount of video VRAM if you’re planning to upgrade your video card or determine whether it meets a game or program’s requirements.
In this tutorial, you’ll learn how to find the amount of VRAM in your video card for Windows 10, 11, Intel Mac, and Linux computers.
How to Check VRAM in Windows 10
You have a couple of ways to check the amount of VRAM on a computer running Windows 10—via the Settings app and the DirectX Diagnostic Tool.
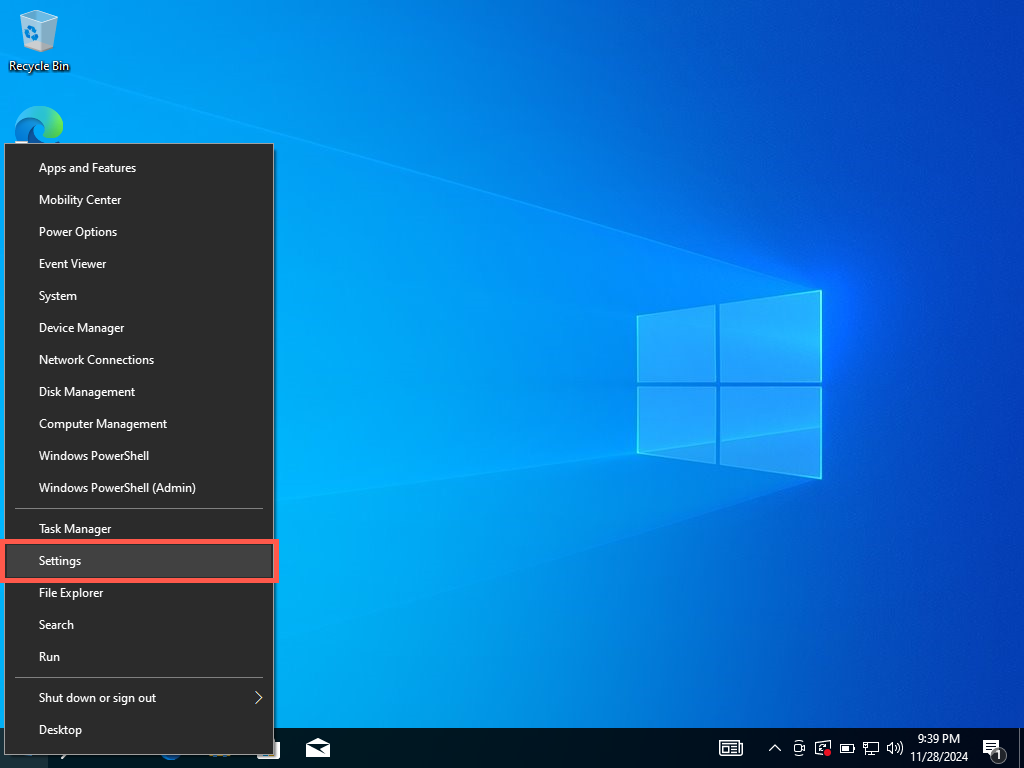
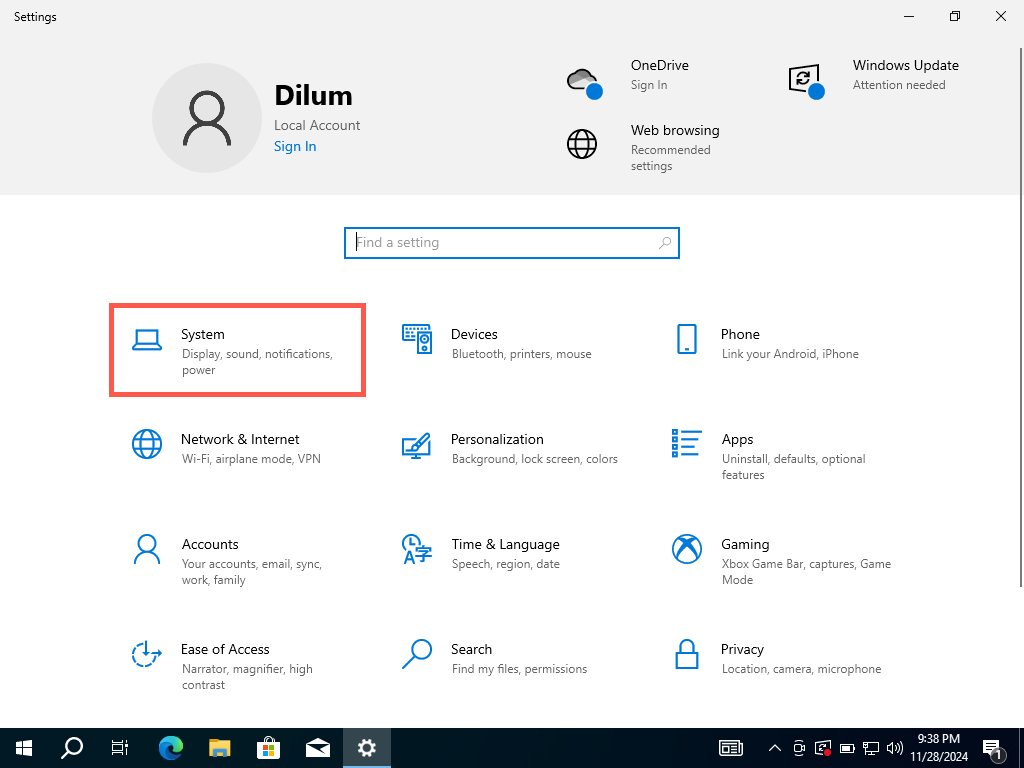
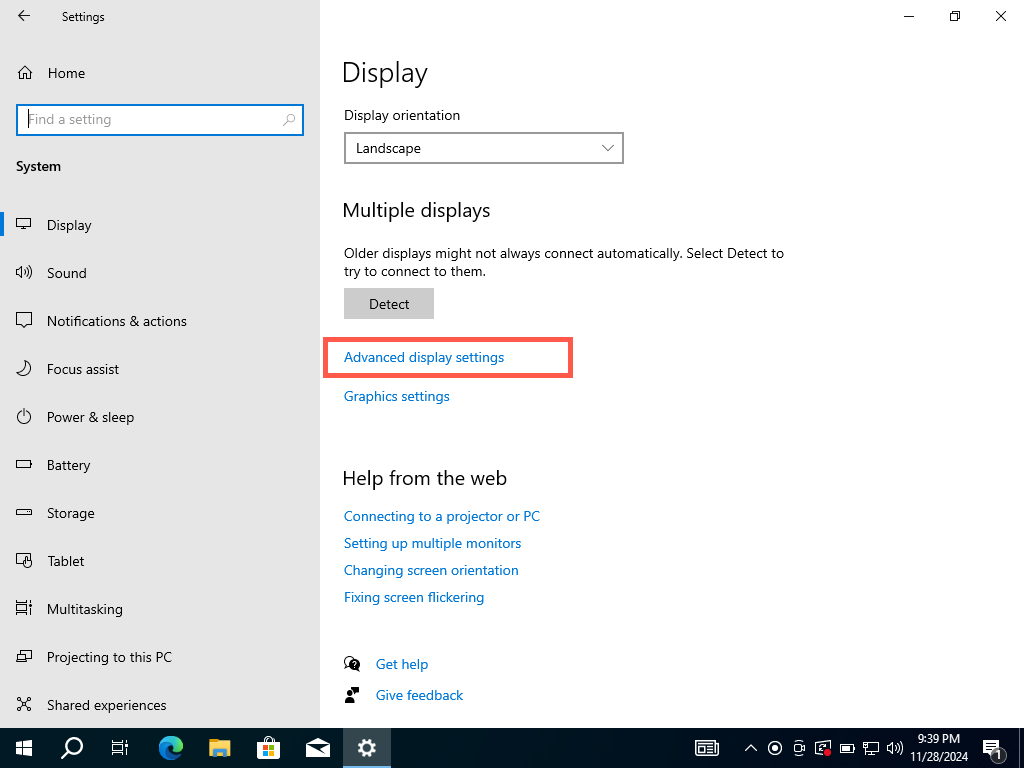
How to Check VRAM in Windows 10 via the Settings App
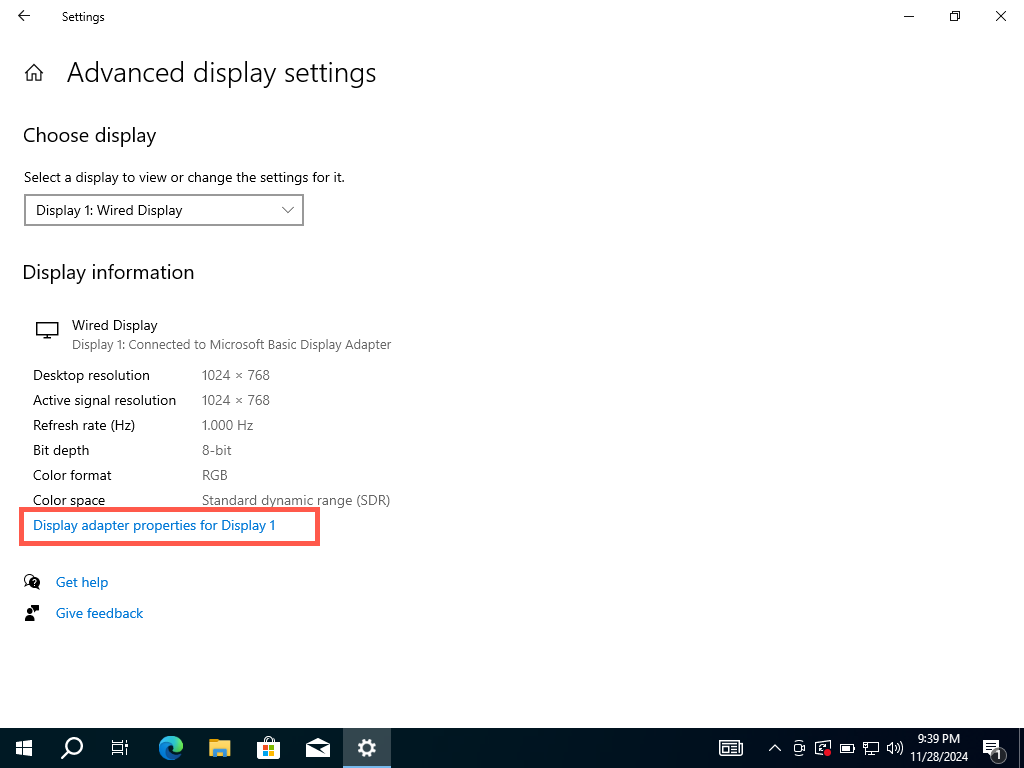
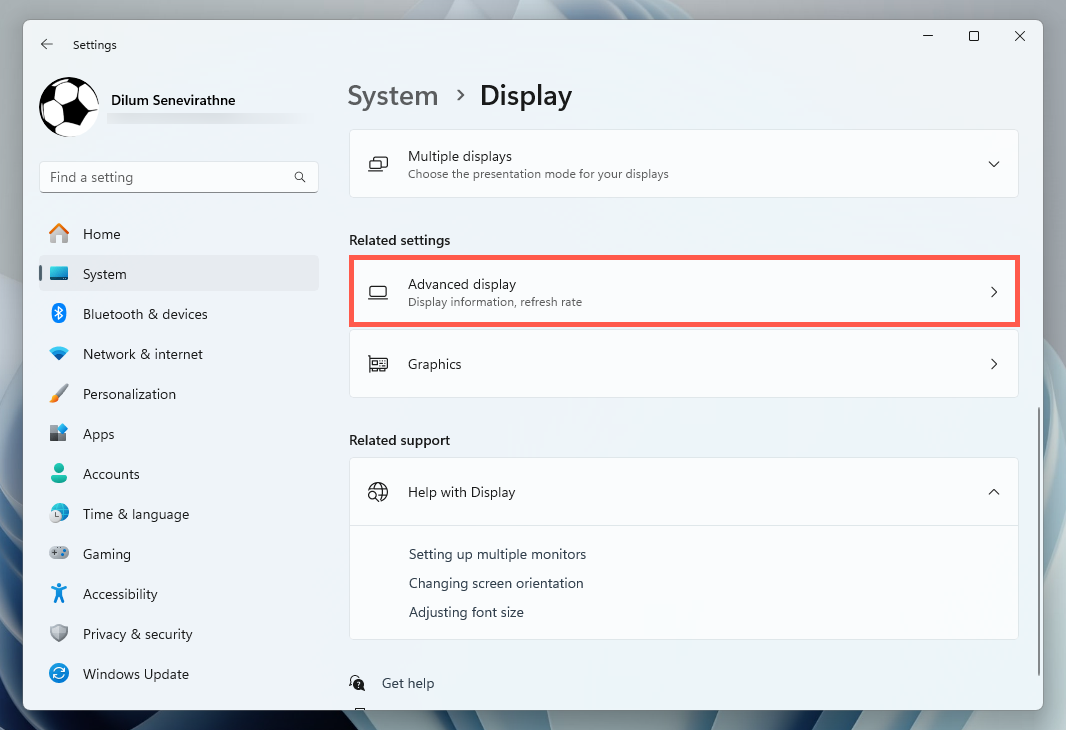
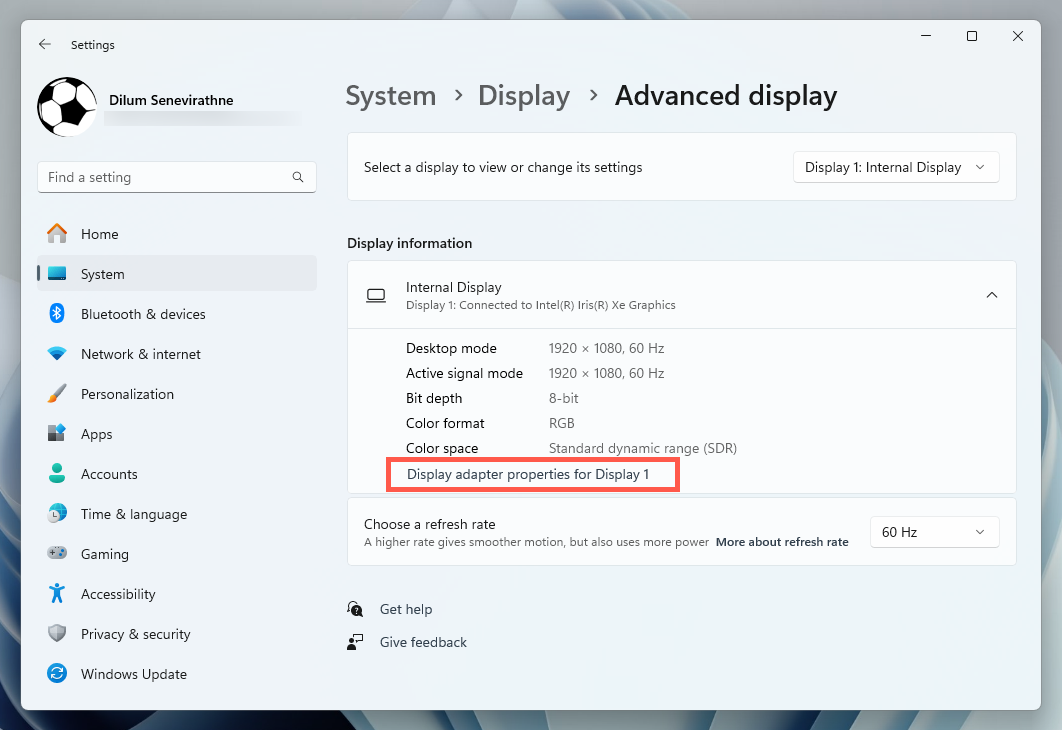
To check the VRAM in Windows 10 via the Settings app, head to the Advanced Display Settings and access your video card’s Properties dialog. Here’s how:
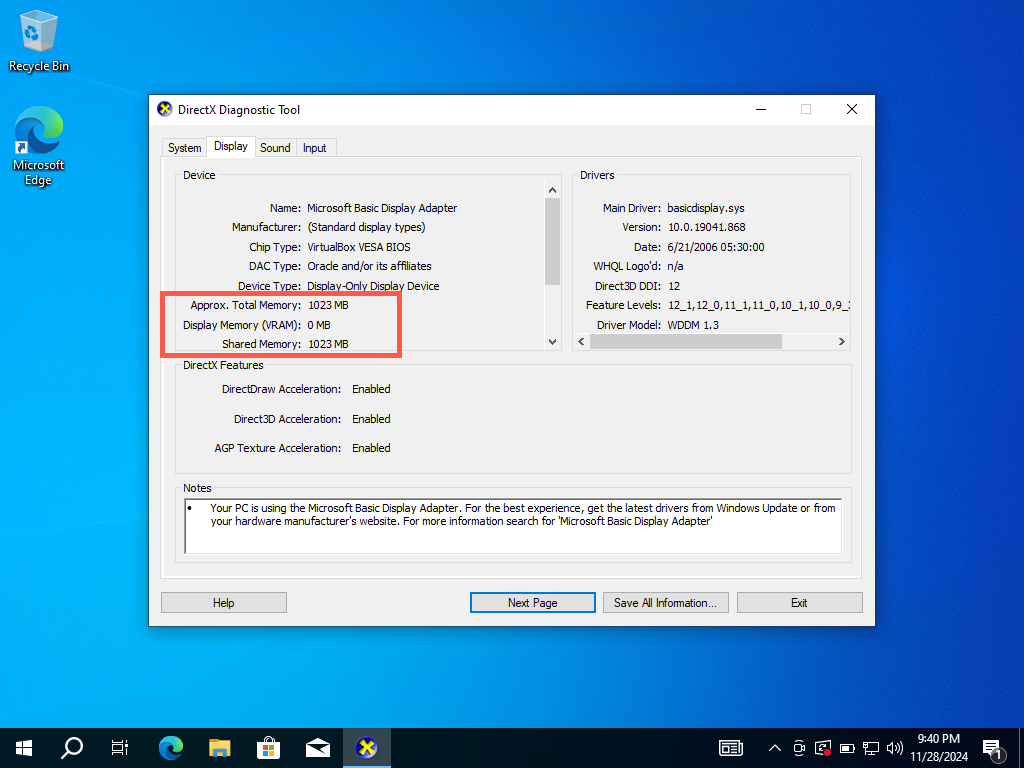
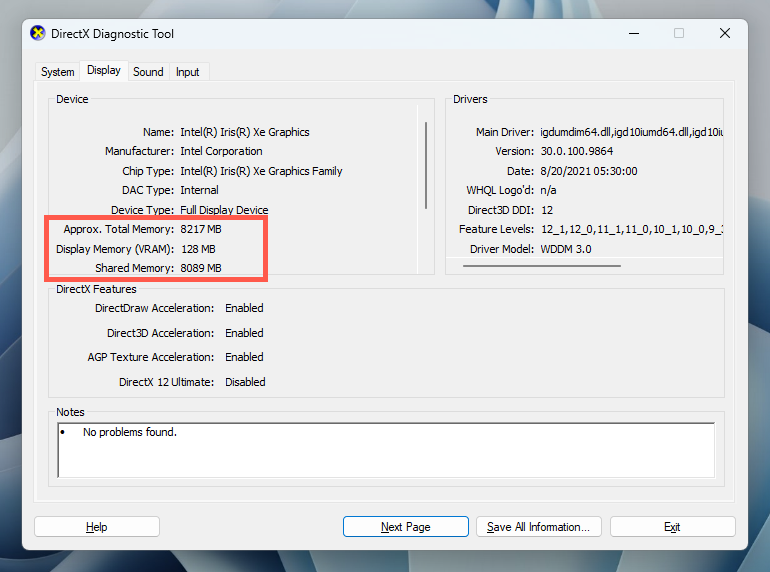
How to Check VRAM in Windows 11 via the DirectX Diagnostic Tool
If you have more than one GPU, you can use the DirectX Diagnostic Tool to check the amount of RAM for each card.
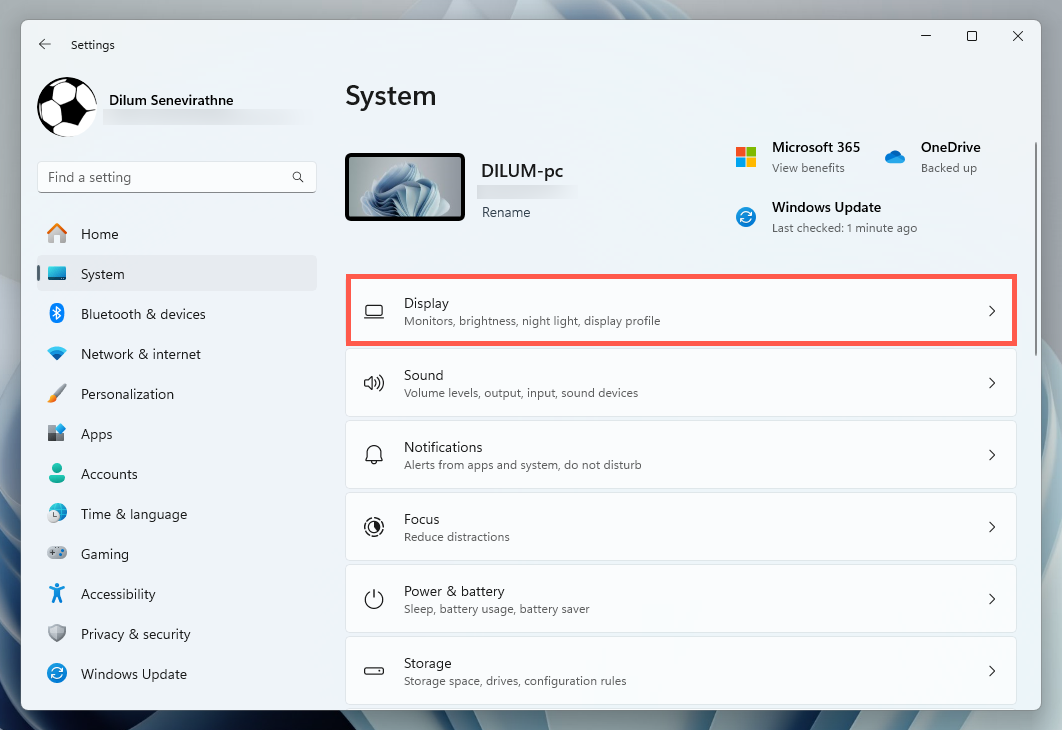
How to Check VRAM in Windows 11?
Checking your VRAM in Windows 11 is similar to checking the VRAM in Windows 10—use the Settings app if you have one video card or the DirectX Diagnostic Tool if you have more.
How to Check VRAM in Windows 10 via the Settings App
How to Check VRAM in Windows 11 via the DirectX Diagnostic Tool
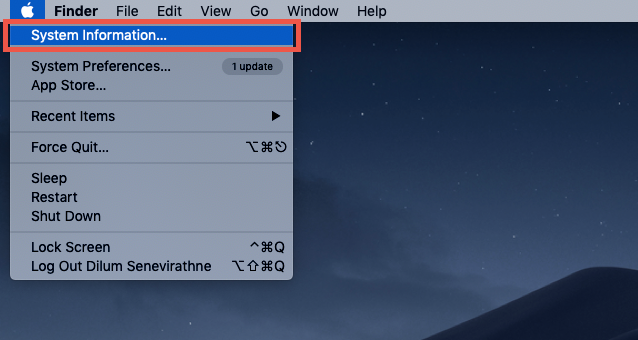
How to Check VRAM in macOS
If you’re using a Mac running on an Intel chipset, you can check the amount of VRAM through the System Information app. Here’s how:
How to Check VRAM on Linux
Most Linux distros allow you to check the VRAM through the Terminal. The exact Terminal command may differ depending on your Linux distro, so if the command below fails to work, you might want to check its online documentation.
glxinfo | grep -E -i ‘device|memory’
What Is VRAM?
VRAM is the memory used in graphics processing units (or GPUs) to store the image data and textures you see on the screen. Keeping this information in the VRAM allows the GPU to quickly access it instead of from slower storage sources like the system RAM or the hard drive. More VRAM results in smoother rendering and higher frame rates in video games and 3D software.
Differences Between VRAM and Regular RAM
There are various differences between your computer’s VRAM and regular system memory (or RAM). For starters, VRAM stores graphical data, like textures and frame buffers, for use by the video card. Regular RAM instead stores data and instructions that support general system operations—not specifically graphics data. Then comes speed. VRAM is more optimized for high-speed image and video rendering operations, while system memory is designed for standard use cases involving the CPU. The latter is still fast but provides less specialized data access for graphics-related activities than VRAM. The location of VRAM and regular RAM is also different. VRAM is located on the video card, while regular RAM is on the motherboard. This is often why integrated video cards (which use system memory) are much slower than dedicated video cards.
Types of VRAM
VRAM comes in many forms, so you’ll likely see many confusing abbreviations. Let’s check out a few of them:
GDDR (Graphics Double Data Rate): GDDR is the most common type of VRAM used in consumer-grade GPUs. The most recent iteration—GDDR6—is used in gaming PCs, consoles, and workstations. Use cases involve gaming, 3D rendering, video editing, and general-purpose GPU tasks. HBM (High-Bandwidth Memory): HBM is a newer type of VRAM that stacks memory chips vertically to offer higher memory bandwidth. It is used in professional-grade GPUs for tasks like AI processing, scientific simulations, and deep learning. SGRAM (Synchronous Graphics RAM): SGRAM was used in older graphics cards. It was the first type of VRAM that could access two sections of memory at once. Although it’s no longer in use, it played an important role in advancing VRAM technology.
Why More VRAM Matters
The more VRAM your computer has, the better it can handle graphically intense applications. For example, when gaming at high resolutions (4K) or working with 3D rendering, the graphics card needs to process large amounts of visual data quickly.
VRAM allows the GPU to store all the necessary textures, models, and frames for faster access. If the VRAM is insufficient, your computer allocates slower system memory (RAM) for graphics processing. This results in performance bottlenecks, stuttering, and low frame rates.
Why Is Checking VRAM Important?
Checking your VRAM helps determine if your system can handle graphically intensive tasks or specific applications. Many modern games and professional software—like Adobe Premiere and Blender—have specific VRAM requirements. If your computer fails to meet these requirements, you might encounter major performance issues. VRAM also affects how efficiently your GPU can process high-resolution textures, 3D models, and videos. The more VRAM you have, the better the GPU handles larger files and higher resolutions. This is particularly important for tasks like:
Gaming: Higher resolutions (1440p, 4K) and texture quality demand more VRAM. Without enough video memory, games will stutter, experience frame drops, and display lower-quality textures. Video Editing: For high-resolution video editing (e.g., 4K or 8K), more VRAM helps store and quickly access video frames and effects, improving playback and rendering times. 3D Rendering and CAD: Applications like Blender, Autodesk Maya, and other 3D tools require massive amounts of VRAM to handle complex models and textures.
If your computer’s VRAM is insufficient, the GPU frequently uses slower system RAM. In games, for example, this can lead to texture “pop-in,” where low-resolution textures are replaced with high-res versions too late. To resolve performance issues, you may need to reduce texture quality, resolution, or other graphical settings, ensure no other GPU-heavy apps (e.g., video editors) are running, or upgrade to a GPU with more VRAM.
How to Check VRAM Stability?
VRAM stability is crucial for smooth system performance in tasks that require heavy graphics rendering. Unstable VRAM can lead to crashes, artifacts, or system freezes when under load. You can check RAM stability using stress test tools and benchmarking programs.
Stress Test Tools: Use memtestVULKAN, OCCT, or FurMark to check VRAM stability under load. These tools stress the GPU and its memory by repeating intense graphics tests. Benchmarking Programs: Use 3DMark or Unigine Heaven to benchmark your GPU and monitor for any instability, such as crashes, overheating, or artifacts.
VRAM instability is usually caused by GPU overclocking—reducing clock speeds can help stabilize performance. Inadequate GPU cooling is another common reason, so ensure your video card has adequate ventilation if stress tests show poor results. Outdated or faulty drivers can also lead to instability—keep your GPU drivers up-to-date, and this shouldn’t be an issue.
Is There Any Way to Test VRAM?
Yes, you can use various tools to test your video card’s health, performance, and stability. These include:
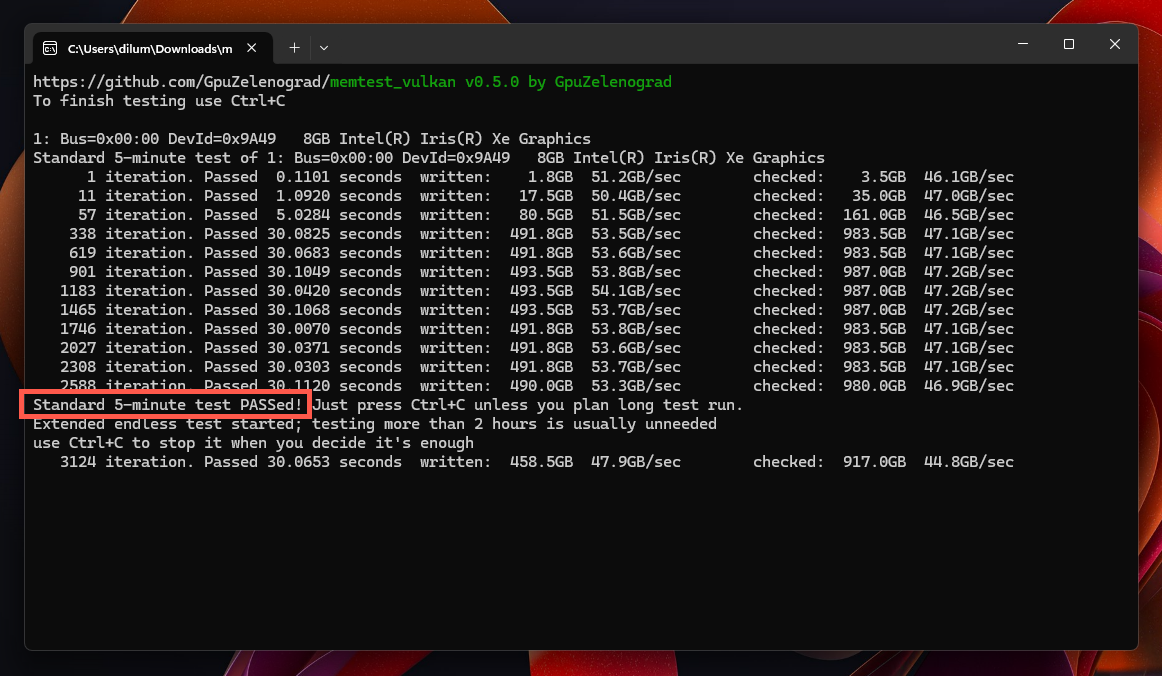
FurMark: An easy-to-use stress-testing application that records GPU performance and stability by pushing it to its limits. 3DMark: A popular benchmarking program that runs intensive graphics tests to evaluate the performance of your GPU and VRAM. memtestVULKAN: A command-line utility that exclusively tests your GPU’s memory (VRAM) for stability issues on Windows and Linux.
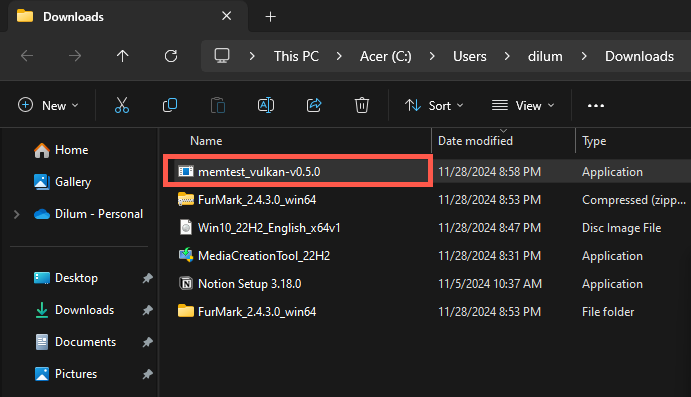
As an example, here’s how you can use memtestVULKAN to test your VRAM on a Windows computer:
Conclusion
As you just learned, checking how much VRAM your computer has is a breeze, especially if it’s a Windows PC. It’s a handy way to see if your system can handle that new video game that just came out or help plan your next video card purchase. And if you’re running into performance problems, don’t forget to try stress testing tools to identify VRAM stability issues.